Thursday, January 29, 2015

Go Hawks!

Everywhere in Seattle this week, SeaHawks colors of blue and green are flying proudly.  The "12th Man" -- the fans -- are represented with a banner.  I decided honor the 12's with a little quilt that will hang on my front door until Super Bowl Sunday.  I enjoyed making a sporting symbol.


Here's how I figured out how to create the numbers.  I looked at finished 12th man flag images on line. . . then drew this sketch.


Here it is before quilting:


Miss C, my 7 year old granddaughter wanted to be cheering.  I told her it wasn't a video, but that didn't stop her from doing a little jump.


It took a while to decide how to quilt this one.  I couldn't do spirals, or swirls (too girly), so I did an outline of the numbers with a cross hatch background.  It would be fun to make the number of your favorite athlete in this way.


I'm cheering for the Seattle SeaHawks on Sunday.  GO HAWKS!  

Friday, January 23, 2015

Friday Finish


I sewed the sections of my flowering snowballs quilt last night.  It's big: 96" X 72".  It'll go in the line up for quilting.  


When it's quilted, it will be easier to get a photo.  

Thursday, January 22, 2015

Sewing Gentle Curves

Sewing curves has been something I have been wanting to do, but it looks so hard!  I started with the "flowering snowball" block because it looked a little gentler.  And it is.  I downloaded the templates and directions from Molly Flanders. (mollyflanders@blogspot.com)  Her directions and samples are great.

The curves are like sewing in an arms eye in garment sewing.  I've done lots of those.  I have been pinning, but not too much.  I also have the needle down; I stop to gently move the convex part as I stitch the two pieces together.

Try this!  It's really do-able.


 I also added a little bit of Seattle.  Notice the Space Needle in the above square.


The colors are taken from a Matisse poster that hangs in my guest room.  I love to use art work as inspiration for colors for quilts.  This quilt will live just under this poster.

Monday, January 19, 2015

Quilting a spiral

I'm not going to do a tutorial here, as there are good ones already published, just a few tips.

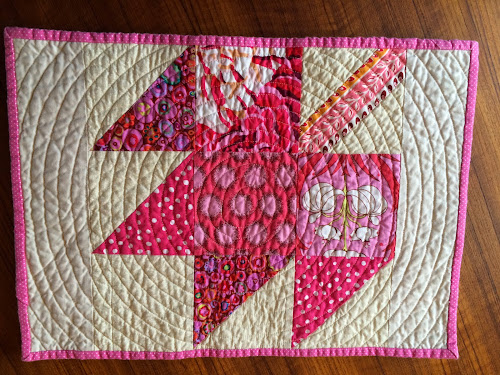
  1. Practice! Just like learning piano or anything else, there is no substitute for practice. I did a set of placemats that were just the right size for practice. This one is the last of the set.
  2. The most difficult part is the middle where you begin. I used a free motion set up for the middle then switched to my walking foot when the spiral was big enough.

You can see where I started again with back tacking. I'm sure that would never fly with a quilting judge, but for my table it's just fine.

3. The walking foot makes a much more even spiral, keeping the edge of the walking foot lined up with the previous stitching. Pretty soon you easily overlook the wobbly beginnings of the spiral. Be sure to keep your machine in the "needle down" position, so nothing slips as you turn the quilt under the pressure foot.

4. When the quilting is finished, the little imperfections blend into the whole and help create that handmade look!

I love spiral quilt. I have a twin sized quilt waiting in the que. I'm playing with a few other things, so it must wait.


Thursday, January 15, 2015

Quilted Apron


Amanda Jean at Crazy Mom Quilts made a quilted apron with lots of polka dots.  I loved the idea, and used my turquoise kitchen as inspiration.  (My home was built in the late 1950's, and I've been thankful over the years that the builder chose turquoise and not olive green for the kitchen.  I still have the original turquoise stove top and oven which are limping along!)

Wearing this apron feels a little like wearing a giant hot pad.  I think it will come in handy when cooking really hot things or canning.  If I were to do it again, I would quilt it with just a layer of flannel.  

My daughter is the model.  Notice the little bit of Elvis just below her fingers.  


Here's the slab of fabric.  I made one of the slab quilts ala Sunday Morning Quilts, and this slab is a lot bigger to accommodate the apron shape.  I quilted it first just to the batting.

Sunday, January 11, 2015

The Little Quilter


I stepped into my sewing room on Friday to find my granddaughter, Miss E, busy at my machine.  "I'm making a quilt for you, YaYa," she said.  She had chosen the pink polka dot flannel scraps from one of my drawers of fabric.


She had done lots of pinning!  (And I discovered later, she had also done a little cutting.  OOPS!)
I was glad for three things:
  1. She knows that when she sits at the machine with me (to "help") that she is to keep her hands on the white part of the table.  That kept her fingers away from the needle. . . 
  2. The power was off.  It'll be a long time before I teach her where the on - off switch is located. 
  3. She's pretty good with the pins.
I also was reminded of a lesson:

WHEN IT GETS TOO QUIET, CHECK ON THE TWO YEAR OLD!


Friday, January 9, 2015

Baby Quilt

Here's a little finish for Friday, a baby quilt for my niece. I love the back with the birds by Charlie Harper. It's a little "I-spy" quilt. Can you find Elvis?

The back shows the spiral quilting.
 
linking up to crazymomquilts


Thursday, January 8, 2015

Simple Coasters -- A Tutorial

I made a set of coasters for a host gift in December, I realized that my home needed a set, so I made some for me.  Here's how I did it:

Cut 2 outside fabric (I used home dec weight) and one batting -- 5.5 inches square.


Lay out the squares as follows:
     Batting
     Outside fabric, right side up
     Outside fabric, right side down

Stitch around the outside, with a .25 inch seam allowance, leaving an opening on one side to turn the coaster right side out.  Stitching on 3 layers is much easier with a walking foot which I used throughout this project.


Trim the corners:


Turn the coaster right side out:


Push out the corners with something pointy -- a chop stick, etc.


Press carefully to flatten the coaster, then stitch around the outside to keep it flat and to close up the turning hole.

Quilt as desired:


I quilted in a squared spiral.


Each of the coasters is a little different in the quilting, but I like that.


Friday, January 2, 2015

Happy New Year

I spent New Year's Day quilting one of a set of two for my granddaughters. (They will soon share a room.) This one is for Miss E who is 2 (AND A HALF.). We all three love mermaids, so the first fabric I chose is a little mermaid print. The rest is quite scrappy looking, although many of the prints were chosen particularly for this quilt. Miss E likes stars.

My walking foot got a workout. (And my arms, pushing the quilt through the harp area!)

There are stars and stars, two sizes. This quilt measures 72 x 97. I figure it will fit on an X-long twin when she goes off to college. . . In about 16 years!

I'm going to link up to Crazy Mom Quilts.